Step-by-Step Guide to Building a Simple Language Translator App
Introduction
Creating a language translator app is a great beginner-friendly project for aspiring developers. This step-by-step guide will show you how to build a simple translation app for both web and mobile platforms using the LibreTranslate API. LibreTranslate is a free, open-source translation API that supports multiple languages and is easy to integrate into various development environments.
Whether you’re just starting out or experimenting with your first API-based project, this tutorial will walk you through each stage—from planning and building to testing and deployment.
Prerequisites
Before you begin developing your translation app, ensure you have the following:
- Basic Programming Knowledge: Understanding of basic web or mobile development and how to work with APIs.
- Development Tools: A code editor like Visual Studio Code, and optionally Git for version control.
- LibreTranslate API Key: Use the public endpoint or self-host your own instance of LibreTranslate.
- Internet Connection: Required if you’re using the public API.
Choose the Right Tools and Technologies
Selecting the right tools is crucial to the success of your app. Since this guide is language-agnostic, here are some flexible options:
- Frontend Technologies:
- For web: HTML, CSS, JavaScript, or frameworks like React or Vue.
- For mobile: React Native, Flutter, or other hybrid mobile frameworks.
- For web: HTML, CSS, JavaScript, or frameworks like React or Vue.
- HTTP Request Libraries: Use fetch, Axios, or any tool compatible with your chosen language or framework.
- API Integration: The LibreTranslate API is REST-based and works across all major platforms.
Set Up the Development Environment
- Install Your Tools: Set up your code editor and any necessary development libraries or SDKs.
- Obtain the API Key: Get a free API key from LibreTranslate or use the open endpoint.
- Test the API: Use Postman or a command-line tool like curl to send test requests to the translation endpoint.
- Organize Your Files: Create a project folder and basic files like index.html, script.js, or equivalent for your tech stack.
Design the App Structure
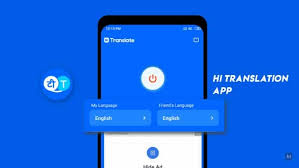
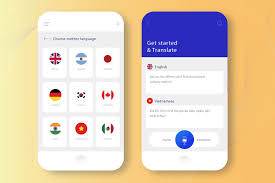
Plan the user interface and application logic. A simple language translator app should include:
- Text Input Field: Where users type the text they want to translate.
- Language Dropdown Menus: Select the source and target languages.
- Translate Button: Initiates the translation process.
- Result Display Area: Shows the translated text.
Design with clarity and ease-of-use in mind.
Implement the Core Functionality
Here’s how the app should function:
- Capture Input: Get the user’s text and selected languages.
- Send API Request: Submit a POST request to https://libretranslate.com/translate with the following parameters:
- q: the text to translate
- source: the source language code (e.g., “en”)
- target: the target language code (e.g., “es”)
- q: the text to translate
- Process Response: Parse the returned JSON to extract the translatedText value.
- Display the Result: Show the translated text clearly in the output area.
Add User Interface (UI)
Create a clean, responsive, and user-friendly design:
- Include labeled input fields and dropdown menus.
- Populate the language options using the LibreTranslate /languages endpoint.
- Display translated results beneath the Translate button.
- Style your interface using CSS or frameworks like Bootstrap or Tailwind CSS.
- For mobile platforms, use native components for better usability.
Test the App
Thorough testing ensures reliability:
- Translate different phrases across multiple language pairs.
- Test edge cases like empty inputs and unsupported language codes.
- Simulate network errors and validate error handling.
- Verify responsiveness across devices and screen sizes.
Deploy the App
Choose a deployment method based on your target platform:
- Web Deployment: Use GitHub Pages, Netlify, Vercel, or any web hosting platform.
- Mobile Deployment: Package your app using a mobile framework and deploy it to the Apple App Store or Google Play Store.
- API Security: Never expose your API key directly in the frontend—use environment variables or a backend proxy.
Additional Features to Consider
Enhance your translation app with extra features:
- Auto-Detect Language: Automatically detect the source language for user convenience.
- Text-to-Speech: Enable spoken output for translated text.
- Save Translation History: Let users revisit previous translations.
- Multi-Language Output: Translate into several languages at once.
- Language Swap Button: Allow quick switching between source and target languages.
- Dark Mode: Improve accessibility and design with a theme toggle.
Conclusion
You’ve just built a fully functional language translator app using the LibreTranslate API. This translation app tutorial covered everything from setup and UI design to API integration and deployment. LibreTranslate’s simplicity and open-source nature make it an excellent choice for beginners and developers alike.
Continue building on this foundation by experimenting with new features or customizing the app to fit your needs.
Stay connected with us on HERE AND NOW AI & on

